
One of the most frustrating tasks that I had to figure out when making my first digital poster was cropping on procreate. While it is not that long of a process, it is something that I had to navigate myself. Now that I have the hang of it, I can provide an easy step by step on how to crop your posters.
If you are looking for my post on how to make digital art for procreate in order to sell on etsy, click here.
Why do I need to crop on procreate?
If you are using procreate as your main source for digital artwork, this is something you will need to know. It is an Important skill for learning how to use procreate. Cropping on procreate can become something that you use for more than just posters digitally, but works for many uses.
When you are making digital posters for etsy, it is essential to have multiple size options. This is because you need to have the three main ratios (2:3,3:4,4:5) so that the poster can apply to all framing options. This will expand your customer base, and makes purchases easier on etsy for customers.
With creating digital downloads, creating more options in the buyer’s purchase Maximizes your chances of sales. Not only this, but it invests just a small amount more of your time when creating the poster, instead of dealing with buyer problems later.
Getting started
When you create your poster, there are some important things to remember:
- Remember to keep your layers separate
- When you crop the canvas, it will change the ratio, which can leave empty space with no work. If you keep your layers separate, then you will be able to move these pieces around and resize them to fit the new canvas shape.
- Make sure you are working in a 24“x36” custom canvas
- You will want to work in this size because it is the largest inch size that you will need to have printed. From there, you will size down to 18“x24” for one and 16”x20” for the other.
Step By Step
1.) Duplicate your poster twice
On procreate, select > duplicate and make sure to do this twice.
2.) Rename your duplicates
You will want to rename your two duplicates, change one to the name with the new size it will be. (18”x24” and 16”x20”, because you are starting with 24”x36”.
3.) Select the wrench icon in one of the duplicates
In the top left corner of your canvas, click the wrench icon that is also called the “actions” tab.
4.) Select “canvas” in the top left
The second to left icon under the actions tab will have the “canvas” option.
5.) Select “crop and resize”
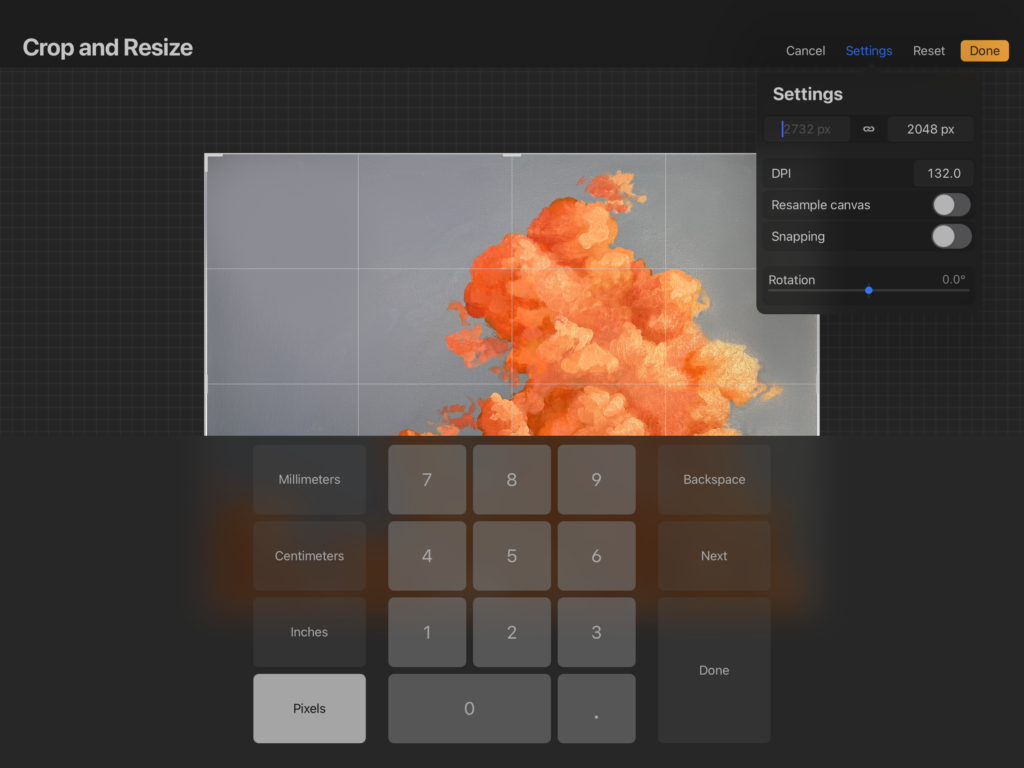
6.) Select “settings”
Settings is in the top right of the screen. At the top of the settings tab, there will be your sizing measurements of the canvas
7.) Switch the inches to 18”x24”
Type the new sizes into the slots, smallest side to largest side.
8.) Toggle on the “Resample Canvas” switch
This will ensure that the crop stays at the same ratio when you expand it to extend past the illustration on your canvas. You will want a side to have extra room, so you can just expand the layers to meet it.
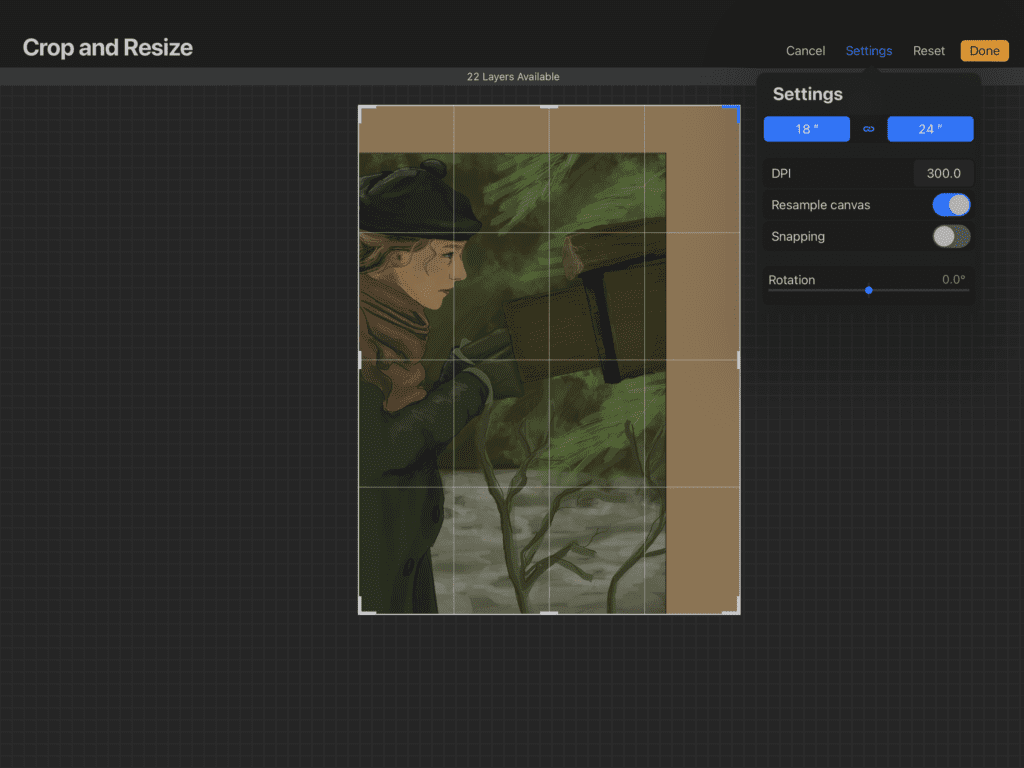
9.) Resize your background and illustrations to fit the screen size
After that, you are all done! Make sure to press “done” and then move on to the next one. Make sure to check out the other post hyperlinked above for the next steps after this!
I hope that this step by step can help some people out! It is a simple solution to making sure that you have your three size variations for etsy. With practice, and referencing this article, you will be cropping on procreate like a pro!
Comments are closed.